
If you are interested in mask making, I recommend the following Facebook groups: “Latex Mask Central (Public)“ and “When I Grow up I Want To Make Monsters And Other Cool Things (Private)“. I want to thank Distortions Unlimited for their amazing YouTube tutorials. Although my sculpting is crude, to have a use-able product on the first attempt was exceptionally rewarding! I left the images intentionally large in order for viewers to clearly see all details. I bought a few books and the images were usually grainy, small, and in black & white.
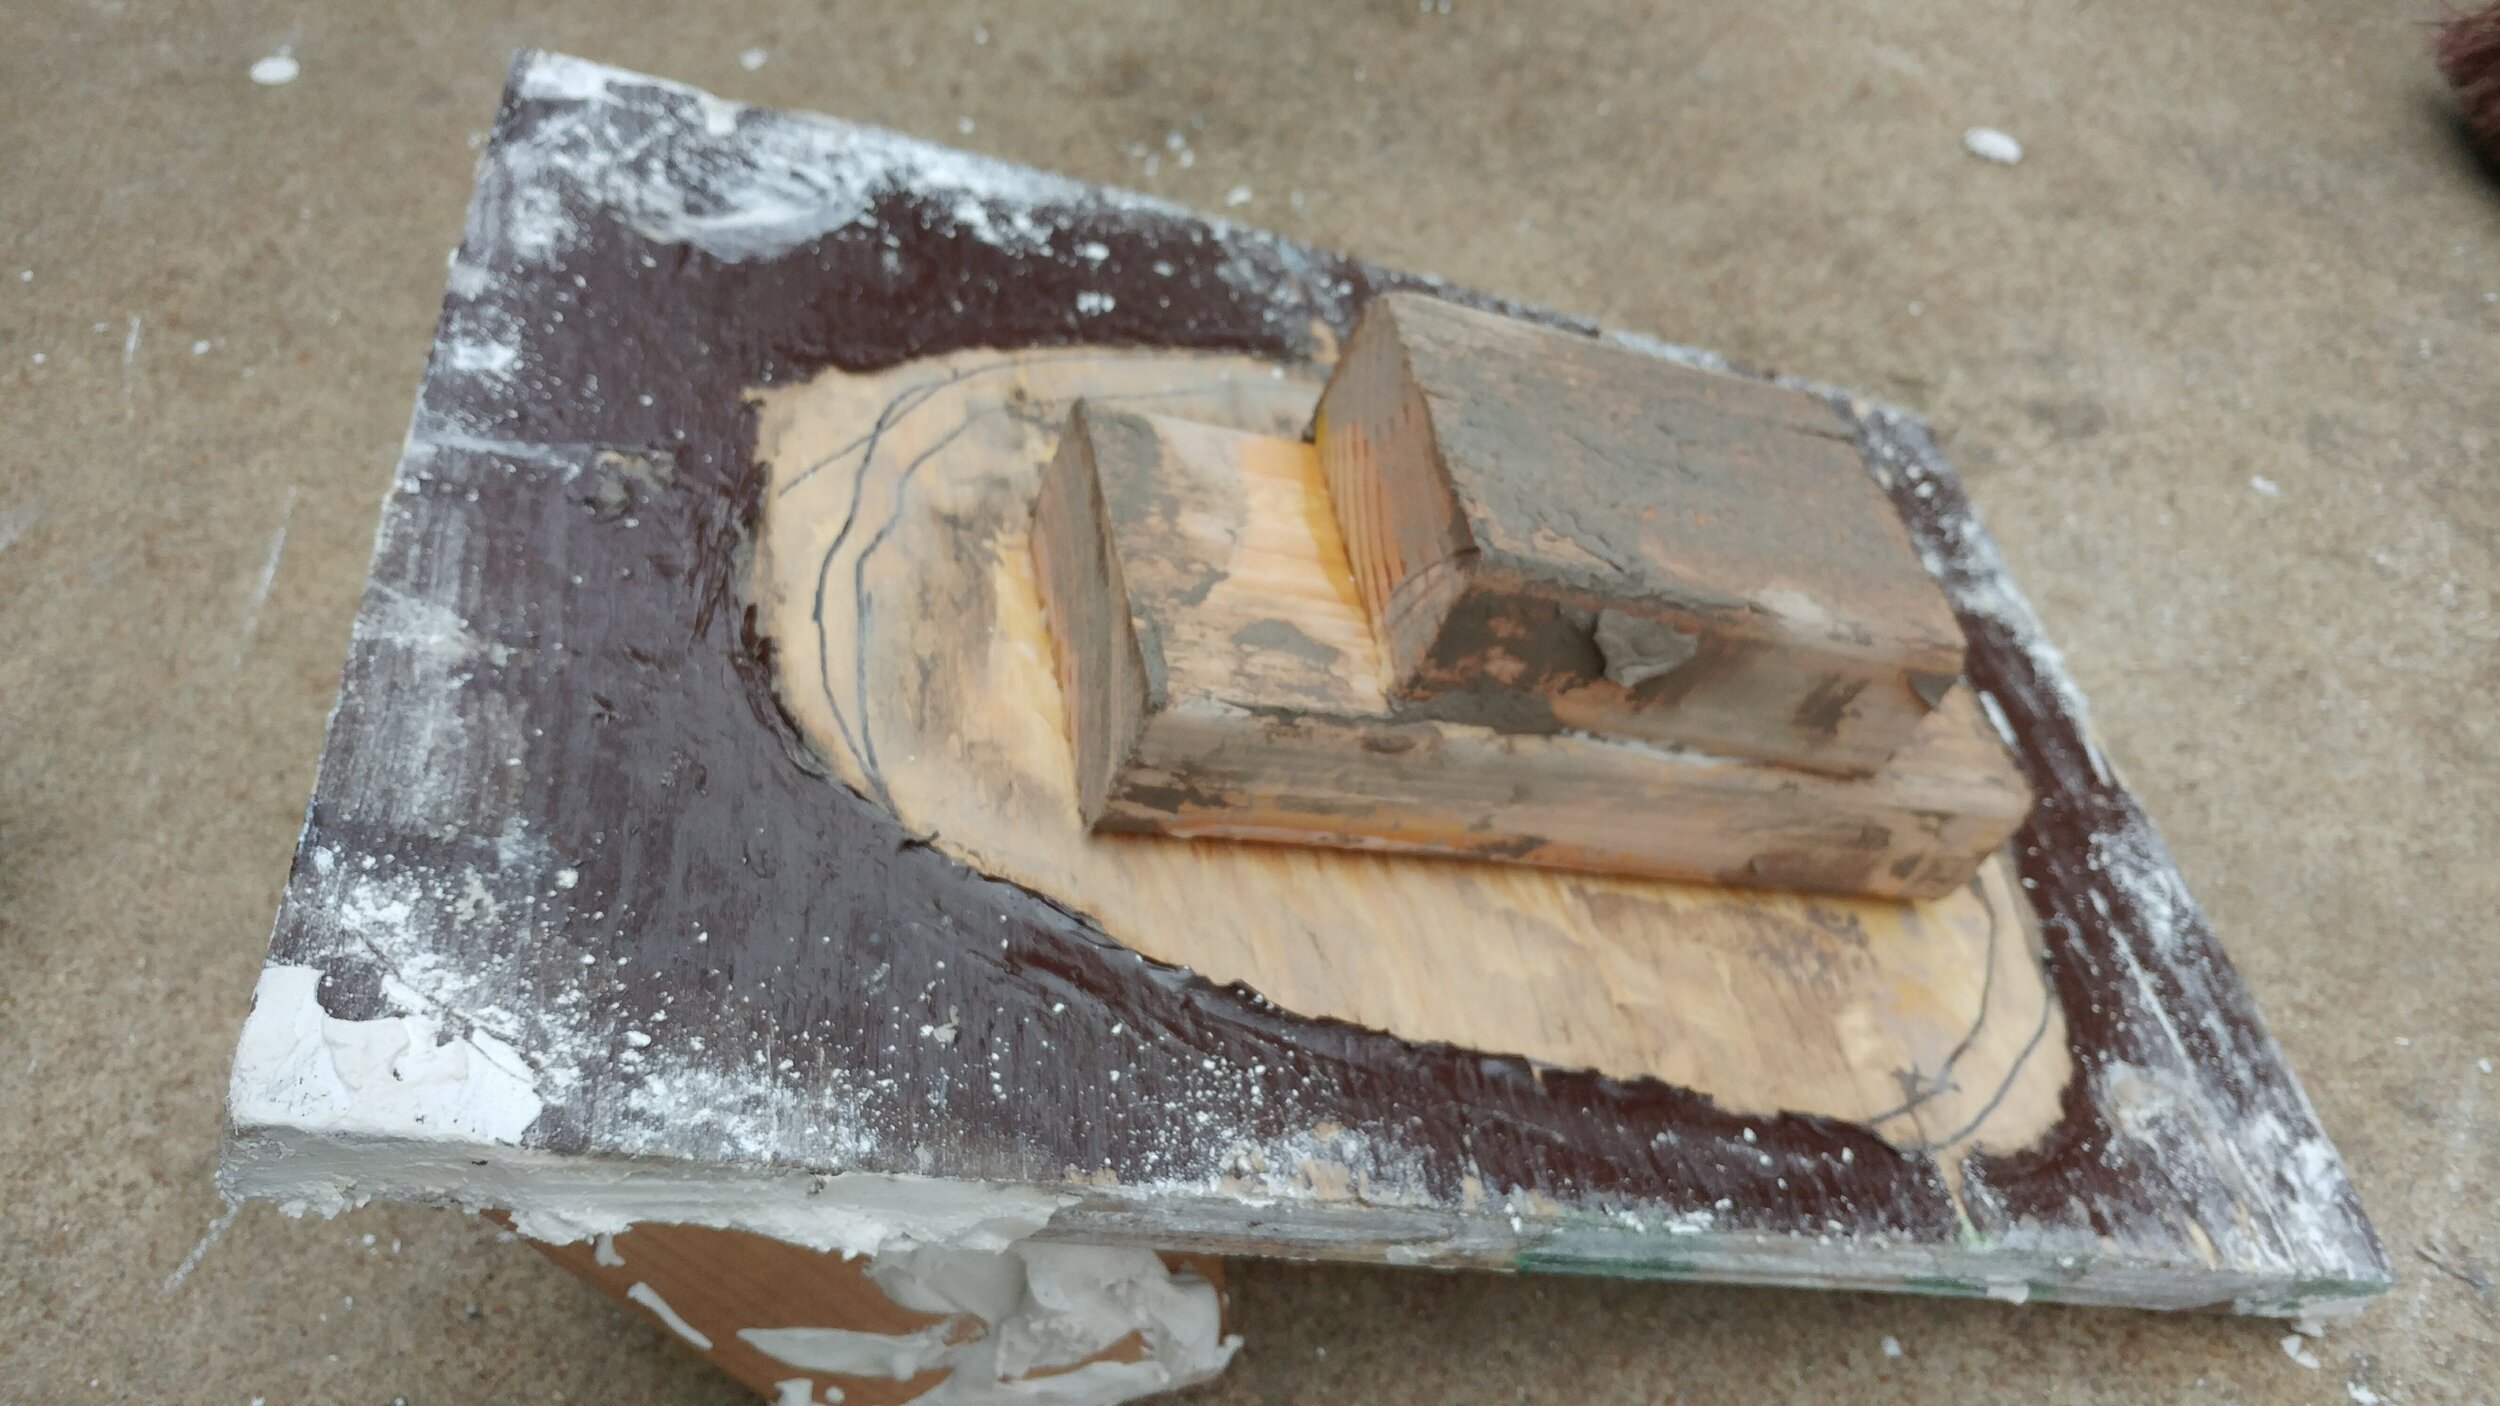
1. Build an armature. Although there are a few ready-made commercial offerings, one can easily put one together with some plywood, a 2x4, and some wood glue. Going the wooden route really helped during the mold separation as you have something solid to beat on. This is nothing more than a plywood and cut 2x4s to serve as a stand.
Materials Needed: Gorilla Wood Glue, cut 2”x4” lumber, cut plywood section, saw.

2. Mold your mask. For this task, I selected Wed clay and used all 25 lbs of it! Thin crevasses become fragile and flake in subsequent stages, so I would try to add larger and more rounder recesses to facilitate clay removal.
Materials Needed: Water squirt bottle, clay sculpting tools, texture pads.
The design was an attempt to mirror a stop-motion, wire armature that will be used in a blue screen special effect shot. I have a life-size matching costume as the armature’s and this latex mask will be used to enhance other practical effects.
3. Once the sculpting is finished, you spray the clay structure with Krylon Supermaxx All-in-One Gloss spray paint. This creates a barrier between your clay and the plaster mold making bulk clay removal a lot easier. Allow the paint to dry overnight.
Materials Needed: Krylon Supermaxx All-in-One Gloss spray paint (recommended)

4. Mix and apply your plaster. For this to work, your armature will need to be fairly level. I accomplished this by temporarily wood gluing a scrap piece of 2x4 to the backside of the plywood opposite it’s angled legs. During the mold removal process, this board was just pulled off as I didn’t let the glue dry overnight.
Materials Needed: As recommended, I purchased a 50lb sack of USG plaster online. It took two orders before a bag of finely powdered plaster to arrive, but with free shipping, I saved myself a nice chunk of cash. If I would do it over again, I’d order from a craft store and just pick it up. For a single mask, you should ONLY need 25 pounds of plaster. I went overboard.
5. Although not required, I added a “splash” second coat with added strips of light weave burlap to provide additional strength. Warning: This stuff gets hot when curing. Don’t burn yourself! Allow the plaster to harden for 45 to 60 minutes. Also, scrape away excess plaster that spills on the plywood as it facilitates the separation process. This makes a mess and it’s heavy!!! Essentially, I had nearly 50 lbs of plaster, 25 lbs of clay, and a wooden armature to schlep along. Plan ahead and have a friend help. Also, wear old clothes.
Materials Needed: Cut up (3”x2”) light weave burlap strips.
6. Once solid and slightly cool to touch, it was time to separate the (wooden) armature from the mold. Using a rubber mallet and a flat-head screwdriver, carefully break the “seal” at the mold’s four corners. I found that hammering a hatchet blade between the board and the plaster quickened the process. Plus, it made a fantastic prying tool. It’s as easy as pulling them away in a vertical direction.
Materials Needed: Rubber mallet, flat-head screwdrivers for prying, a hatchet.
If you’re short on room, I laid a towel on the (open-faced) bucket and sat my plaster mold on top of it.
7. If you sprayed the clay with enough paint, you’ll find that those sections will easily pull from the plaster. I believe that if you took the time to scoop out the top layers of clay (i.e., not touching the flaky paint) you could re-use the clay.
Materials Needed: A heavy trash bag that won’t tear.

8. Now, the real misery starts. All the fine bits of clay needs to be removed from all the crevasses. I spent a half-hour to an hour each day for nearly a week removing clay and there’s probably still some in it. I’d advise using a metal tool to help scrub the inside as I found that tiny ridges are fairly fragile and break.
Materials Needed: Hard toothbrushes, paper towels, cup of water, wooden (not metal) picks.

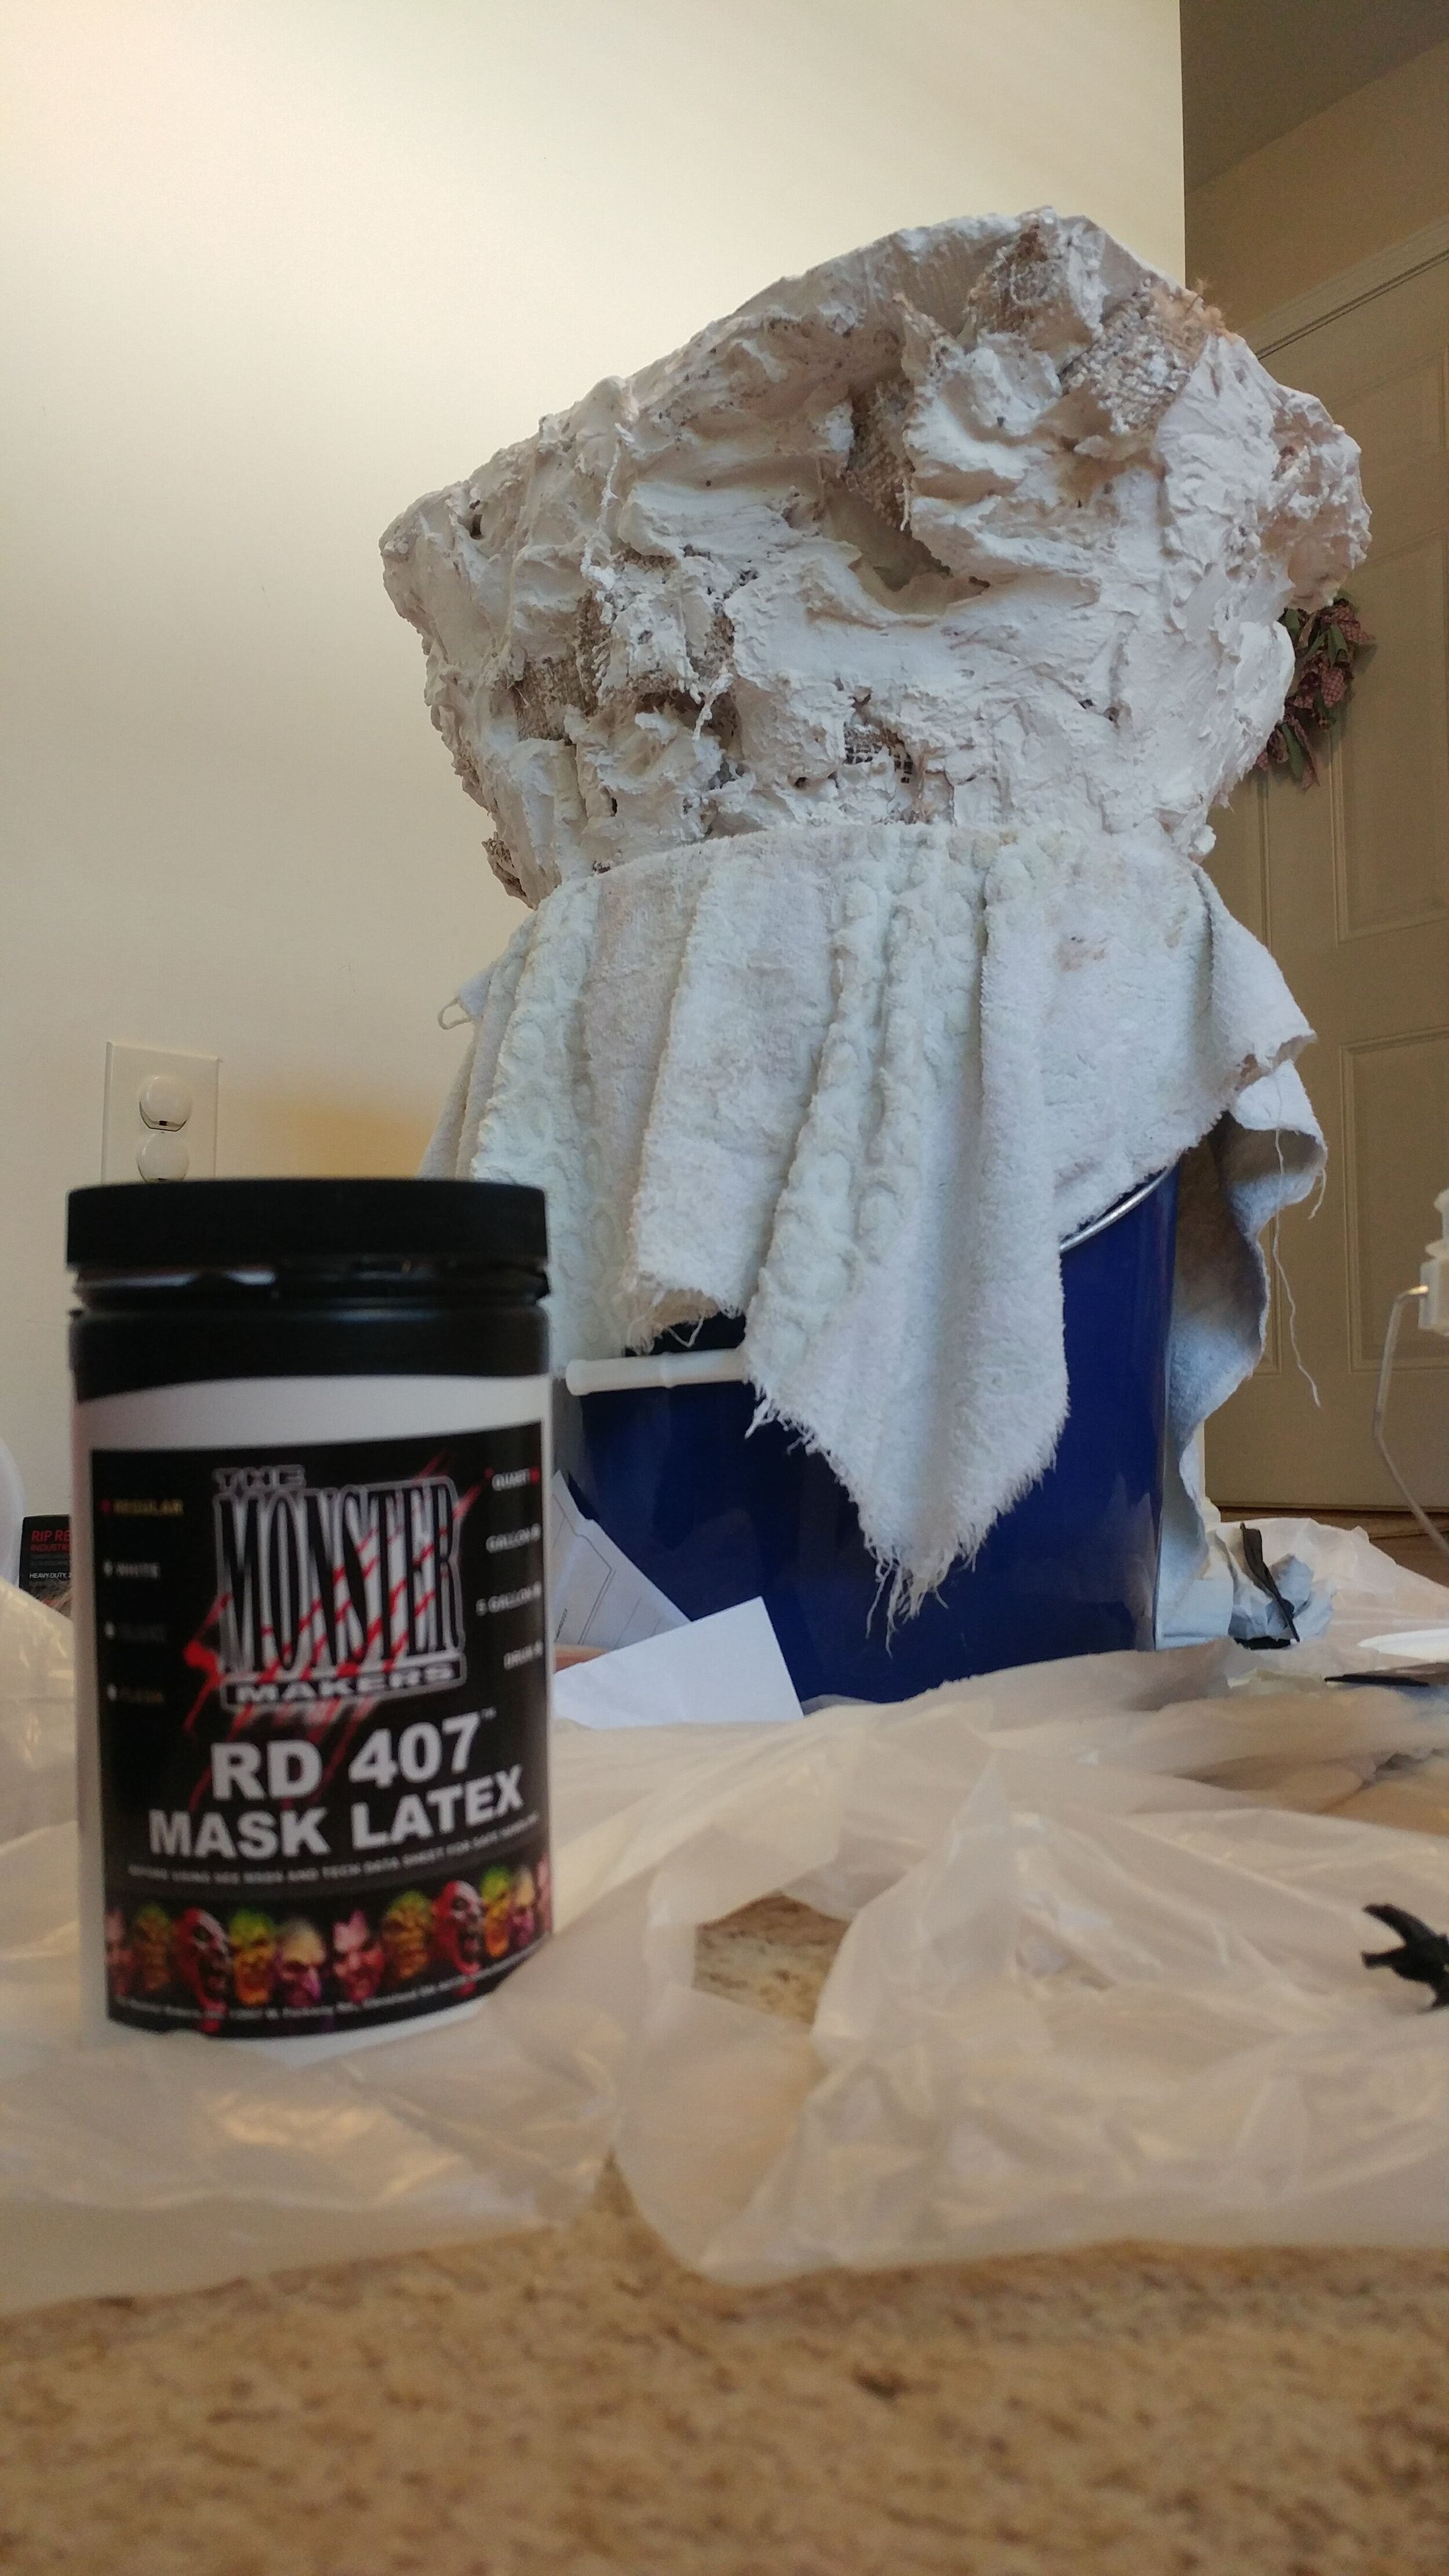
9. Once cleaned out, it’s time to pour the liquid latex. Initially, I purchased two quarts of mask making latex, but after 25 lbs of clay… the sculpture would require more. So, I bought another gallon. If I did it again, I would wait a week before performing this step as the plaster retains moisture from the latex. A week would allow it to sufficiently dry.
Materials Needed: The Monster Makers RD 407 Mask Latex, seal-able container to capture latex for reuse, latex gloves, plaster.
10. Dust the interior of mold with remaining plaster powder. This worked as an amazing and inexpensive release agent.
Materials Needed: Handful of leftover plaster powder.
11. Allow the latex to cure for forty-five minutes, then pour out the excess in the resealable container for re-use.
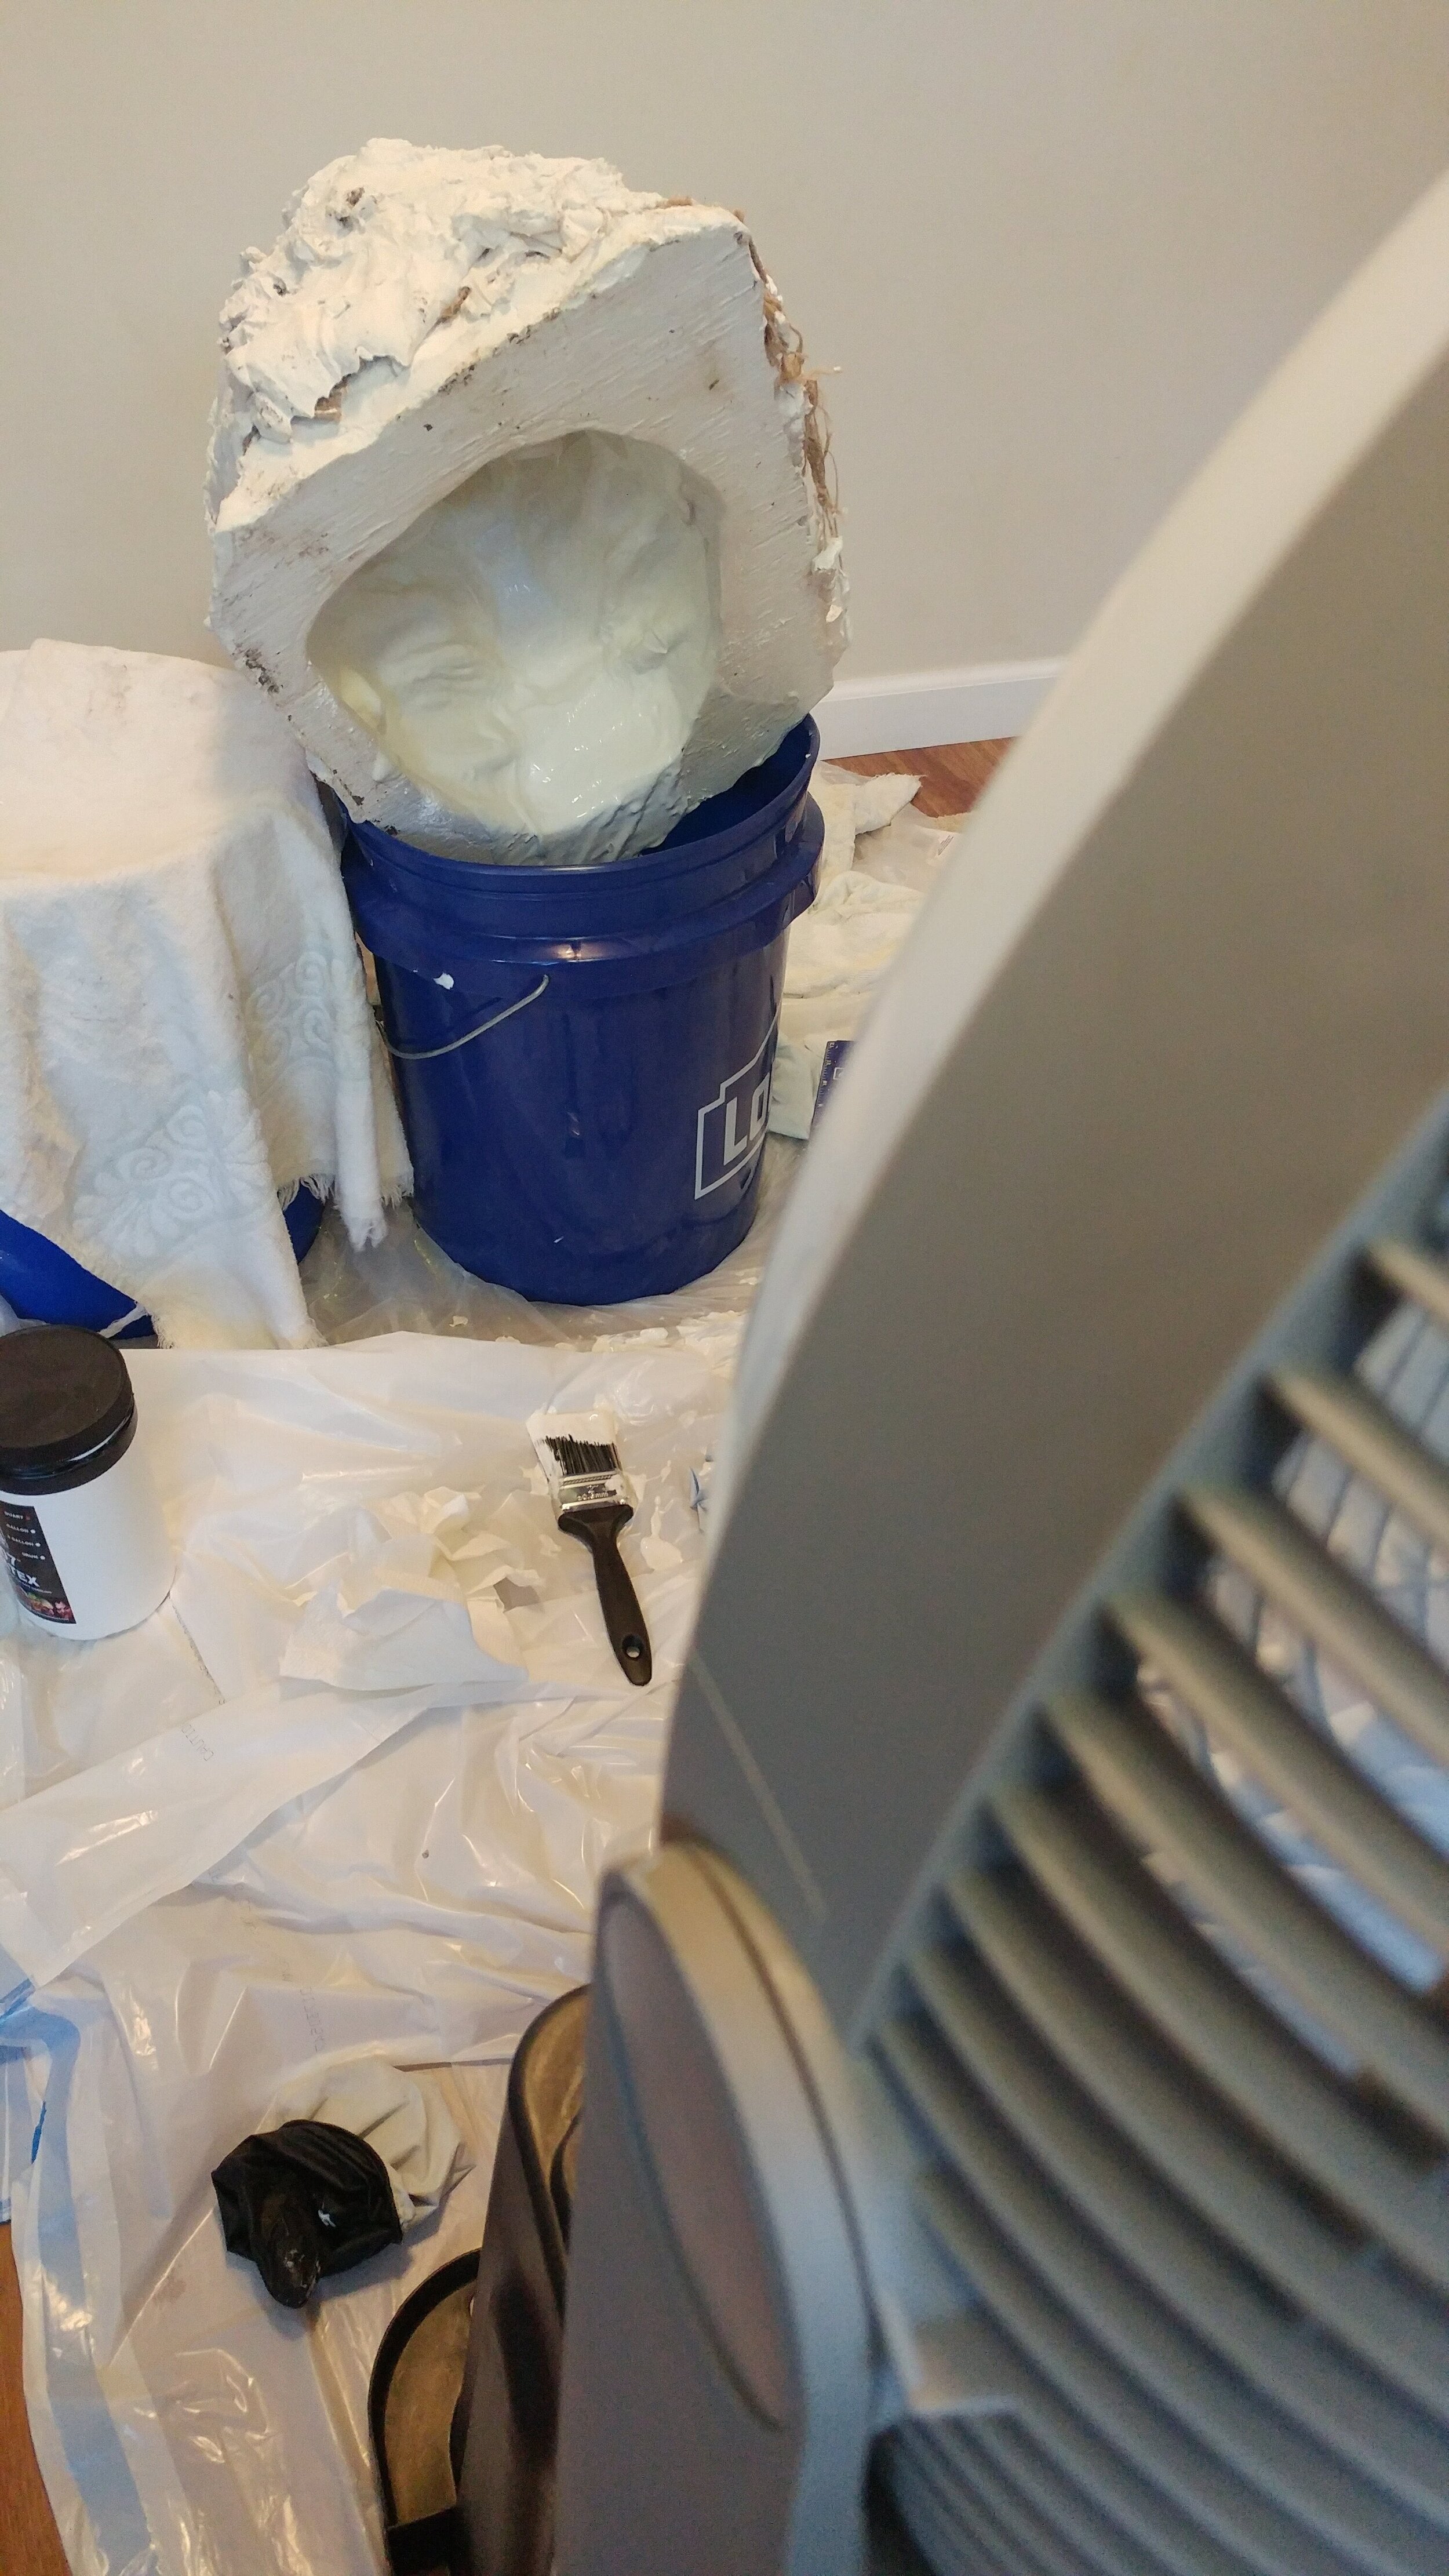
12. Now, let it sit overnight. I had a fan going all night and there was still some wet latex in the deep pockets (around the temple). When dry, the white latex discolors into a dull, yellowish hue. Having sprinkled adequate plaster powder, the mask easily separated from the mold.
Materials Needed: Fan.
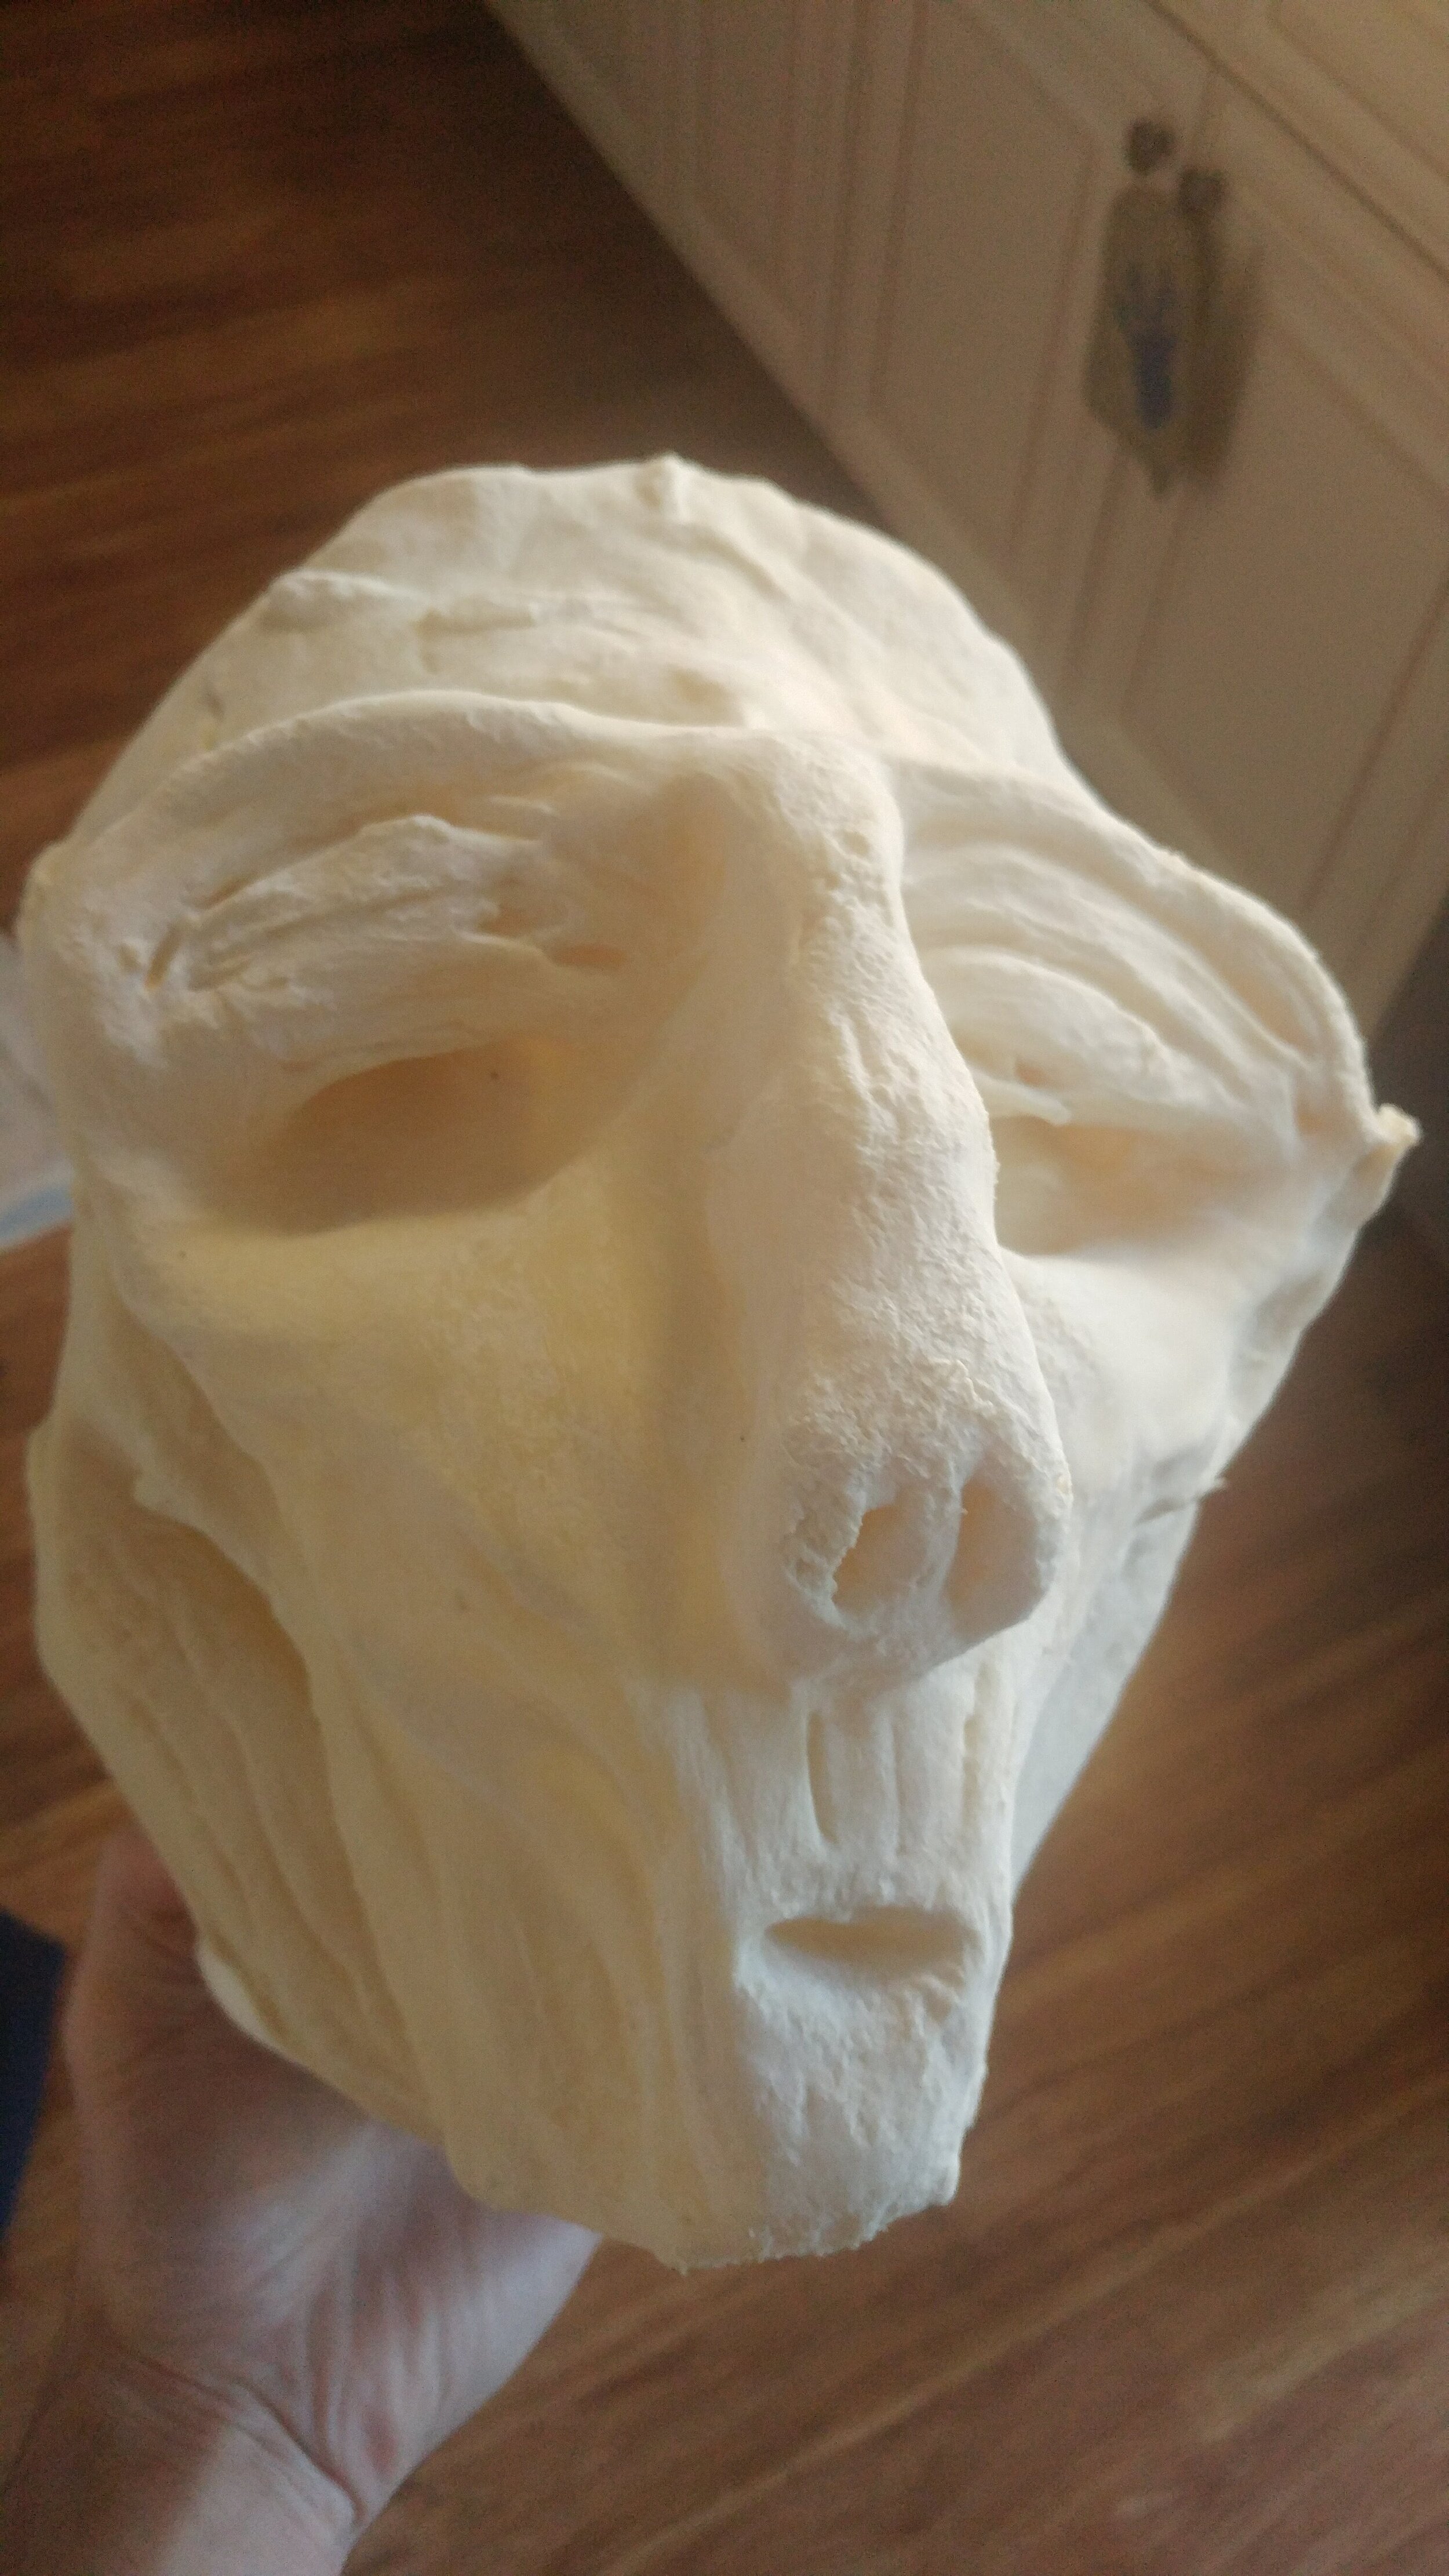
13. Once removed, the flashing was trimmed with a pair of scissors, nose and eye holes cut, too.
Materials Needed: Scissors, fan.
I went ahead and made a spare once this mask came out as all the materials were already set up and we needed a backup mask. From a testing perspective, the second mask was removed after three hours of fan use. This still wasn’t enough time as the eye sockets and cheekbones were still wet. I inverted the mask and added a fan to speed up the drying process. From now on, I’d just let it sit overnight and rest until I get home from work.

14. The next step is to paint the mask. The mixture is straightforward: ⅓ interior house (flat, non-glossy) paint latex, ⅓ mask making latex and ⅓ water. The smallest amount Lowes would sell me was a quart, which was more than enough. I also purchased an empty gallon paint can and wooden sticks for mixing. Everyone pretty much recommends using an air compressor and an auto body-style spray gun or an air brush. To avoid purchasing a compressor, I used Rexbeti’s Ultimate-750 Paint HLVP Sprayer. This did the job fairly well and the paint mixture passed through the sprayer without any difficulty with complete drainage in the required time-frame. If you’re going this route, use the smaller nozzle. I selected the largest (red) nozzle and it sort of spurted paint at times. The masked air-dried in the sun and cleaning the gun was a snap.
Materials Needed: Flat (interior) latex paint, mask making latex, water, paint sprayer, empty gallon paint can, wooden mixing sticks.
Congratulations! You’ve created art! For more filmmaking tips, follow us on Social Media.